My upload schedule may have gotten a little off track, but my train puns certainly haven’t! Hello again everyone and welcome to the third of four Sweet Train cars from the Legend of Zelda: Spirit Tracks. For this entry I had to base everything off of the concept art found in Hyrule Historia because the in game cannon is canonically inedible. That’s ok, I like chocolate more than I like honey anyway ;).
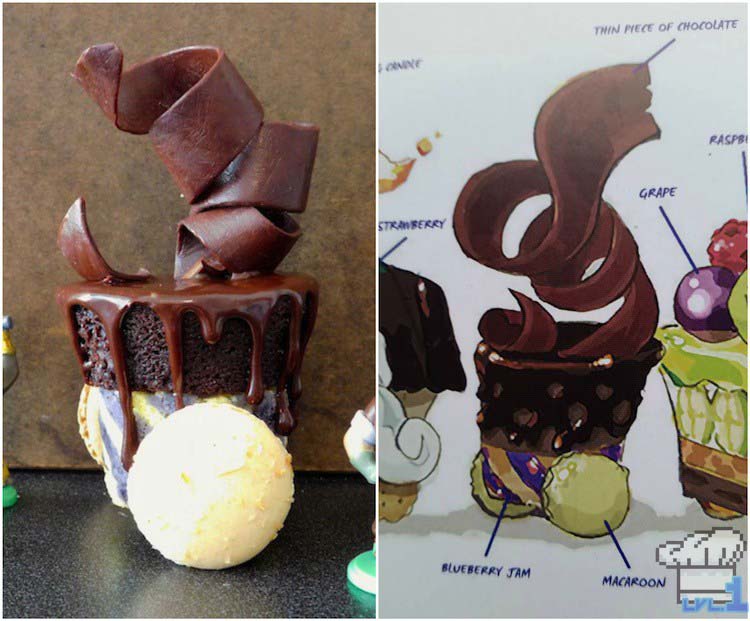
The cannon is the train car that received the most obvious change from concept to its final game version.
![]()
So clearly I needed to go with the cannon on the right when planning out this entry. There actually aren’t that many components, at least fewer than the Cake Passenger Car. The blueberry jam component was really the only one that made me stop and think on how best to execute it. I decided to go with a joconde sponge cake in the end. These are most often used in mousse based entremet cakes to supply a decorative border around the outside. The ability to imprint designs into the sponge using tuile batter would be my way of getting the blueberry swirl as seen in the concept art.
All in all, it’s just a super fancy cupcake, however some of the techniques I go over in the recipes are a little advanced. If you’re planning on giving it a shot, AWESOME :D. I would suggest that you read through the entire procedure before beginning though.
Speaking of beginning, shall we?
In order to achieve the striped pattern on the sponge cake, we’ll need to make two separate recipes. The first is essentially a blueberry tuile batter and the second is the sponge cake itself.
+ Blueberry Joconde Sponge +
ITEMS
| Ingredient | Amount |
|---|---|
| Butter (room temp) | 45 g |
| Powdered Sugar | 60 g |
| Egg Whites | 2 |
| AP Flour | 70 g |
| Blueberry Preserves | 55 g |
| Purple Food Gel (optional) | 1 or 2 drops |
EQUIP
- Electric Stand Mixer
- Rubber Spatula
- Silpat (recommended) — or Parchment Paper
- Baking Sheet Tray
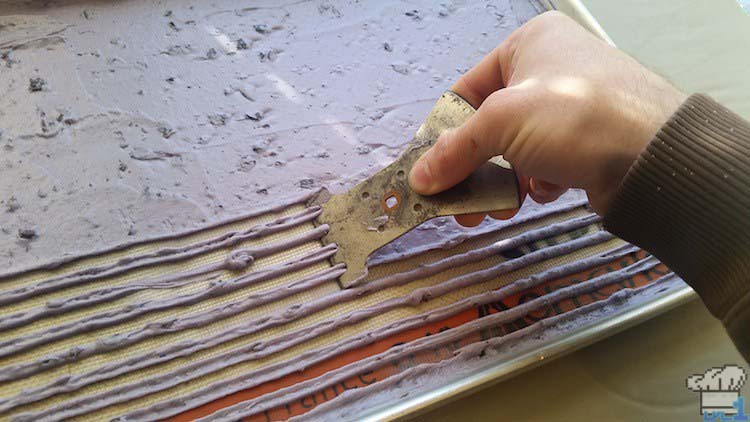
- Cake Comb or other grooved instrument (I had to use part of my meat tenderizer haha)
WALKTHROUGH pt.1
1. Preheat your oven to 450F
2. This is a creaming method recipe, so we’ll begin by combining the butter and powdered sugar in the bowl of an electric mixer fitted with the paddle attachment. Mix on med-high until light and fluffy. It’s important to remember to scrape down the sides of the bowl to ensure all of the batter is combined. Next, reduce the speed to low and add in the egg whites one at a time. Once the eggs are incorporated, go ahead and add in half of of the flour to the batter and mix on medium speed until combined. Finish up by mixing in all of the blueberry preserves followed by the remaining flour (you can add a few drops of color if you feel it needs the extra boost.)
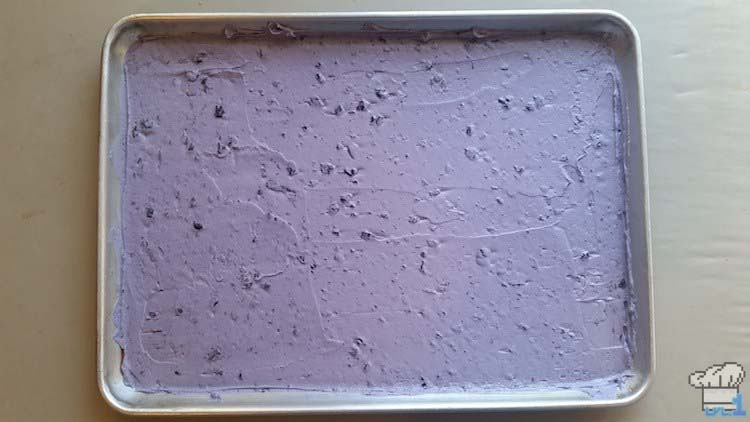
2. Once the batter is thoroughly mixed, spread it out on to a silpat (or sprayed parchment) lined baking sheet about 1/16″ thick. Use a cake comb or other type of grooved tool to create a striped pattern. Press it against the pan and drag it all the way through the tuile batter in one continuous motion.
3. Place the baking sheet in the freezer for 20 minutes to solidify. Meanwhile, we can start the sponge cake!
| Ingredient | Amount |
|---|---|
| Almond Flour | 60 g |
| Powdered Sugar | 60 g |
| AP Flour | 60 g |
| Eggs | 3 |
| Egg Yolk | 1 |
| Egg White | 2 |
| Sugar | 30 g |
| Butter (melted) | 30 g |
EQUIP
- Electric Stand Mixer
- Medium Mixing Bowl
- Rubber Spatula
WALKTHROUGH pt.2
4. Combine the first 3 ingredients in the bowl of an electric mixer and mix to combine with the paddle attachment. While mixing at medium speed, add in the eggs one at a time followed by the one egg yolk. Make sure the previous egg has been completely incorporated before adding the next. Pour the batter into a medium sized bowl and set aside. Clean the electric mixer bowl thoroughly.
5. In your new squeaky clean mixer bowl add the two egg whites and sugar. Mix on medium high speed with the whip attachment until soft peaks are achieved. It’s important to make sure your bowl in clean before whipping egg whites because any traces of fat will impede your ability to stabilize the foam.
6. Use a spatula to gently fold half of the whipped egg whites into the flour/sugar/egg mixture. Stir in the melted butter and then finish by folding in the remaining egg whites.
7. Remove the tuile battered baking sheet from the freezer and make sure it is firm to the touch. Pour the sponge cake batter on top of it and use a spatula to smooth it out making sure the batter gets into all the grooves. We want the sponge to be fairly thin when baked so don’t use any more batter than is needed. We’re looking for just enough to cover the blueberry stripes.
8. Place the sponge cake in the oven for 5-10 minutes until firm but not browned. Be careful not to get it crispy, we need the cake nice and malleable for when we put it all together.
The top half of the cannon car is made of chocolate so I figured a cupcake would be the perfect match. The chocolate cake recipe I used in my Portal Cake post makes great cupcakes so why fix what isn’t broken.
+ Chocolate Cupcakes +
ITEMS
| Ingredient | Amount |
|---|---|
| Sugar | 173 g |
| Eggs | 1 |
| Veg Oil | 88 g |
| Water | 189 g |
| Salt | 1/4 tsp |
| Vanilla | 1/2 tsp |
| AP Flour | 110 g |
| Cocoa Powder | 38 g |
| Baking Soda | 1/2 tsp |
EQUIP
- 3×4 Standard Muffin Tin
- Electric Stand Mixer
- Sifter
- Medium Mixing Bowl
- Pan Spray
WALKTHROUGH
1. Preheat your oven to 350F
2. Add the sugar and eggs to the bowl of an electric mixer, fitted with the whip attachment, and mix until combined. Slowly add the veg oil, water, vanilla, and salt while continuously mixing on low speed. Next, we can combine the dry ingredients. Sift the AP flour, cocoa powder, and baking soda all together into a medium sized mixing bowl. Turn the mixer off and add about half of the dry mix to the bowl, then resume mixing on low speed. Add the remaining half and increase the mixing speed to medium for about 2 minutes.
3. Grab a standard muffin tin and coat the inside with some pan spray. You should have enough batter to fill up the cups about 3/4 of the way so go ahead and do that. If you have any batter left over, consider making yourself a little extra snack in another pan :9. Anyway, personal treats aside, bake the cupcakes for 15-20 minutes and then set aside to cool.
To emulate the dripping chocolate on top of the cupcake I turned to one of my favorite frosting recipes from Wayne Gisslen. It never fails to make an impression!
+ Chocolate Fudge Icing +
ITEMS
| Ingredient | Amount |
|---|---|
| Sugar | 227 g |
| Corn Syrup | 70 g |
| Water | 60 g |
| Salt | 1/4 tsp |
| Butter | 57 g |
| Powdered Sugar | 113 g |
| Cocoa Powder | 43 g |
| Vanilla | 1 tsp |
| Hot Water | as needed |
EQUIP
- Small Sauce Pot
- Candy Thermometer
- Electric Stand Mixer
- Rubber Spatula
WALKTHROUGH
1. Add the first four ingredients to a small sauce pot and bring to a boil. We’re looking to bring the temperature up to 240F (115C) so use a candy thermometer if you have one. If not, pay attention to when the bubbles begin to slow down and grow larger before popping. This is a sign that the water has been boiled out which allows the sugar to rise in temperature beyond that of water’s boiling point (212F/100C) …science!
2. While the sugar is cooking, place the next four ingredients in the bowl of an electric mixer. Use the paddle attachment and mix until fully combined. Reduce the speed to low.
3. When the sugar reaches the correct temperature, remove it from the heat and slowly drizzle it into the chocolate mixture taking care not to get any on the paddle as it spins. Once all of the sugar is added, test the firmness of the icing and feel free to mix in a little hot water if you feel it’s too stiff. The icing should be spreadable, but also not too fluid.
And finally, the piece de resistance of this car can be none other than the chocolate twirl “cannon barrel” that sits atop the cupcake. Although conceptually I believe it’s meant to be a giant curl of shaved chocolate, I decided to make some modeling chocolate or chocolate “plastic” so I could have more control over the shape.
+ Chocolate Plastic +
ITEMS
| Ingredient | Amount |
|---|---|
| Dark Chocolate (60% is good) | 3 oz |
| Corn Syrup | 40 g |
EQUIP
- Microwave-safe Bowl
- Large Mixing Bowl
- Rubber Spatula
- Plastic Wrap
- Paper Towels
- Rolling Pin
- Banana (optional)
WALKTHROUGH
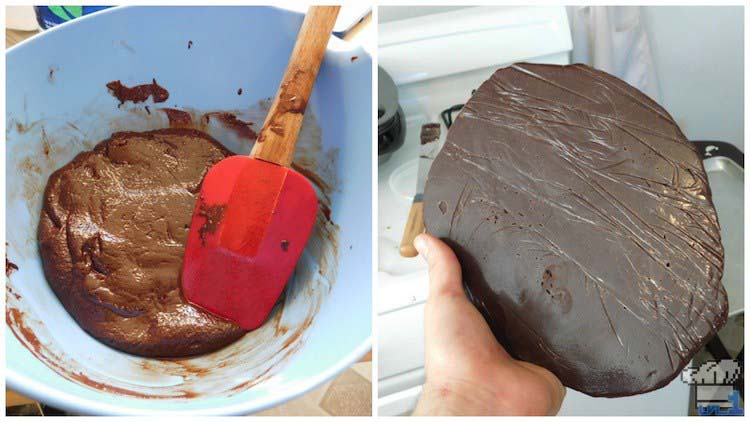
1. Place the chocolate in a microwave-safe bowl and microwave until completely melted. Don’t heat it for more than 30 seconds at a time so as to prevent burning it.
2. Once melted, pour the chocolate into a large mixing bowl along with the corn syrup and mix together with a rubber spatula until smooth and combined. Wrap the chocolate mass in plastic wrap and press it into a flat slab. Place in the refrigerator for 30 minutes to an hour.
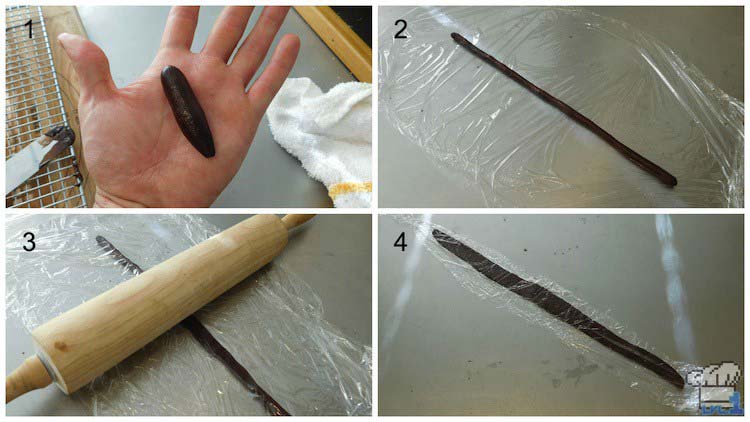
3. Remove the chocolate from the fridge, unwrap, and use a paper towel to pat down any oily patches. Break off a little piece with your fingers and start kneading it. The warmth from your hands will be enough to make it pliable and take whatever shape you like!
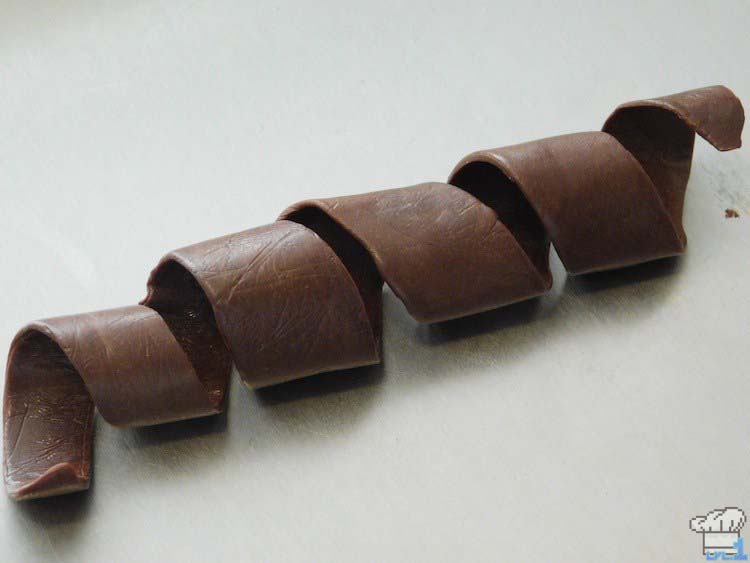
4. To create a spiral, break off a small amount on chocolate and knead until soft. On a clean work surface, roll it out into a long snake with your hands. Transfer this on top of a piece of plastic wrap and cover it with another, then use a rolling pin to gently flatten out the shape. You’ll want to return it to the fridge for a few minutes every so often while your shaping so that it doesn’t get too soft. Remove the plastic wrap and begin creating a spiral shape by twisting the chocolate around your finger or something similar. I actually used a banana to help achieve my shape!
5. Keep adjusting and cooling in the fridge until you’re happy with the result! Chocolate plastic can be used for a ton of different things so have fun and try out whatever forms you like. Think of it as edible clay :D.
We finally made it to the end once again and I’m sure we’re ready for the payoff! Let’s start at the bottom and work our way up!
+ Assembling the Cannon +
EQUIP
- Sharp Knife and Cutting Board
- 2″ Ring Cutter (recommended)
- Piping Bag with Round Tip
- Buttercream (I used plain, but the chocolate variation in this recipe might be nice too)
- Scissors (recommended)
- Patience
WALKTHROUGH
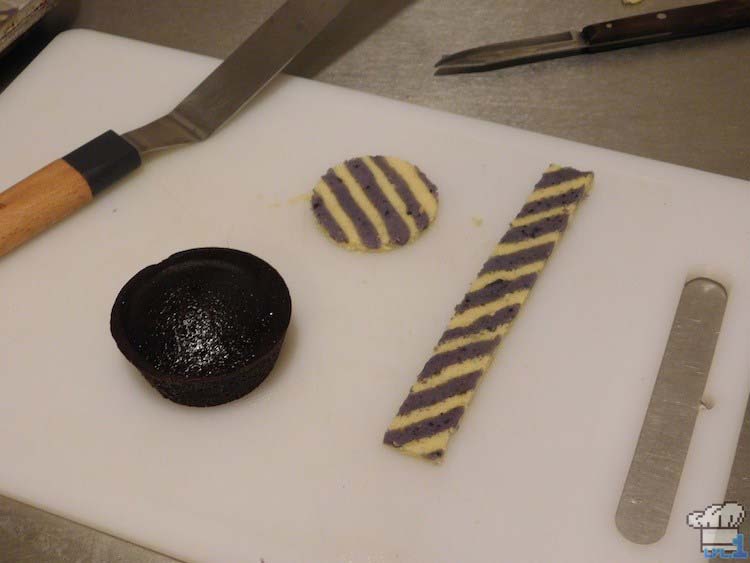
1. Let’s do this! First we’ll need to create the bottom of the cupcake out of the striped joconde sponge we made. Use a 2″ ring cutter (or do your best with a knife) to cut out a few circles of cake. Next, take your knife and cut out a long thin (about an inch wide) rectangular piece diagonally across the stripes so it looks like this [/ / / / /].
2. The next step is to trim the strip down to about 5.5 inches and curl it around the circumference of the circle. I used a muffin tin to help guide me, but it’s certainly not required. Place the sponge circle down first and pipe a short dollop of buttercream in the center so it spreads almost all the way to the edge. This will help the cake strip bend around and begin to adhere. Speaking of which, take your cake strip and being careful not to tear it, slowly curl it around the buttercream. If it ends up being too long and there’s overlap, use a pair of scissors to do some last minute surgery.
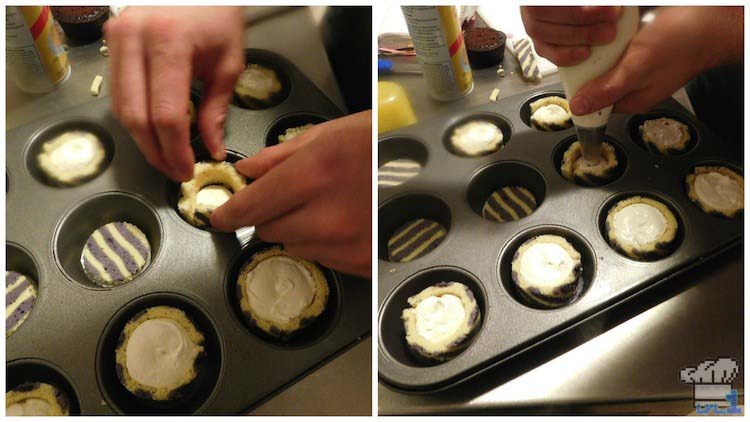
3. Finish the base by filling up the remainder of the space inside with buttercream and leaving it a hair taller than the sponge around it.
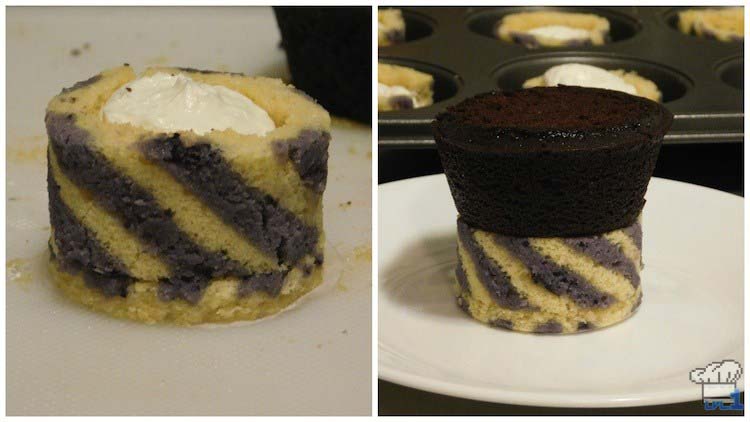
4. Ok, I know that was a pretty tough, but this next part is easy. Take one of the chocolate cupcakes you made and use a knife to shave the top flat (hellooo cake scraps :9.) Place the cupcake on top of the sponge cake base and press down firmly so it adheres to the buttercream.
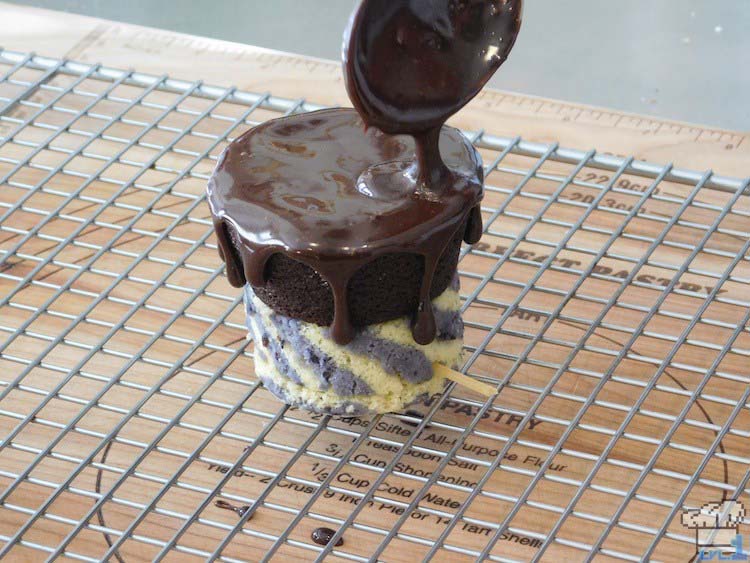
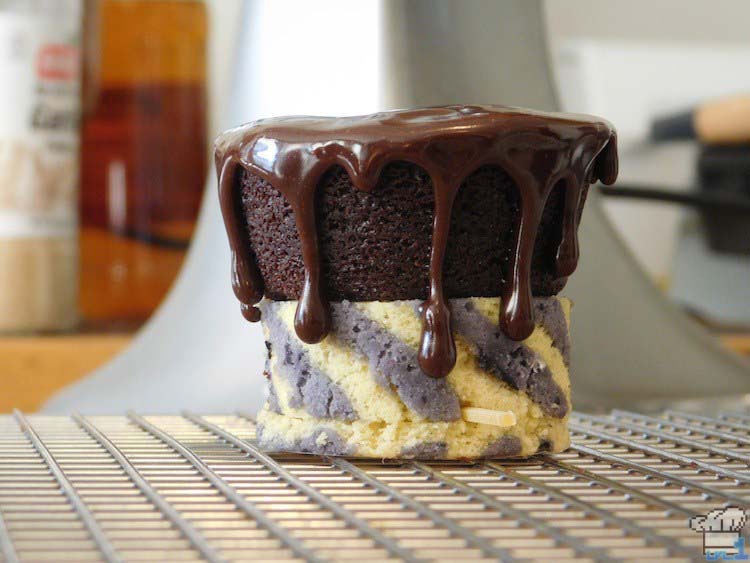
5. Now for my favorite part, applying the drippy chocolate fudge icing. Make sure the icing is warm and use a spoon to add a small amount to the center of the cupcake. Use the back of a clean spoon to slowly spread the icing out towards the sides. Be careful not to use too much as all it needs is a little nudge off the side to see those iconic drips. Continue nudging all around the edge to get a varied, natural look.
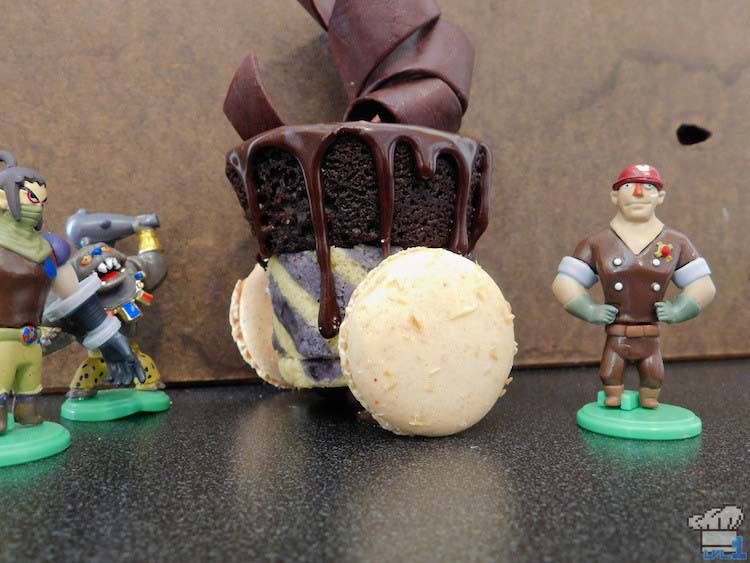
6. Almost there! All that’s left now is to apply the chocolate plastic curl to the top!
7. Oh, what’s this about macaron wheels you ask? Well, I figured there was so much else going on in the train car that I’d give myself and you all a little break. Translation: I bought them :X. BUT, if you’re interested in making french macarons, I do go over the procedure in my Glamburger recipe, so check it out there!
BOOM!
We did it, guys! Another Sweet Train car down and only one more to go. Again, my apologies about the spotty upload schedule, but I should be returning to normalcy soon! See you next time!
Hey! Thanks for reading all the the way to the end! You’re awesome :D! If you haven’t already and are looking for more nerdy food stuff, consider following me on Twitter, Facebook, tumblr and Instagram. I post a lot of work in progress pictures for the blog as well as some stuff from my real job as a pastry chef. If that sounds like something you’d be into, please check out those links above! Anyway, take care everyone and I’ll see you soon with an all new recipe!