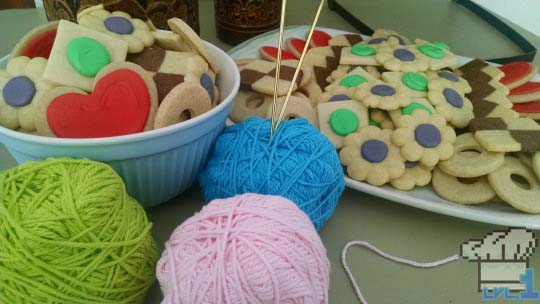
I really enjoyed Kirby’s Epic Yarn so when they announced a new ‘yarn’ game, I was pretty pleased. To take such a cool aesthetic and mix it in with the great gameplay of SMW2: Yoshi’s Island can only make for a fun gaming experience. To celebrate the release of Yoshi’s Wooly World, I thought I might try some of the iconic Yoshi Cookies from one of the green dinosaur’s first games way back on the NES. I mean, where else do you get to see Mario dressed up like a chef? I hope you enjoy them!


Click ‘Continue Reading’ for the recipe and more pictures, after the jump!
+ Sugar Cookie Base +
This is the recipe you will use for the Heart, Square, and Ring cookies
ITEMS
| Ingredient | Amount |
|---|---|
| Butter (softened) | 1 lb (4 sticks) |
| Superfine Sugar | 1 1/2 cups |
| Eggs | 2 large each |
| Vanilla | 1 TBSP |
| AP Flour (sifted*) | 6 cups |
| Baking Powder | 1/2 tsp |
| Salt | 1 1/2 tsp |
*Measuring Sifted Flour: measuring flour volumetrically (instead of by weight) can be problematic, as the density of flour can vary widely depending on how tightly packed it is. To achieve a ‘standard’ density of flour, we can sift it ahead of time and either spoon it in to our measuring cups, or gently scoop and level off the top. Simply sift into a large bowl and then remeasure the amount the recipe calls for out of that portion. You can pour the unused sifted flour back into your bag or container once you’ve gotten what you need
EQUIP
- Electric Mixer
- Plastic Wrap
- Rolling Pin
- Cookie Cutters
- Cookie Sheets
- Parchment Paper
WALKTHROUGH
- Place butter and sugar in the bowl of an electric mixer, fitted with the paddle attachment, and cream together until light and fluffy; about 2 minutes. (Alternatively, you can use a hand held electric egg beater and a large bowl for these recipes, if you do not have a stand mixer)
- Add in the eggs, one at a time, as well as the vanilla. Once combined, scrape down the sides of the bowl.
- Add in the flour, baking powder and salt into the bowl, in 3 separate additions. Be careful to mix slowly at first, to incorporate (so you don’t end up with dry ingredients everywhere!). Scrape down the sides and bottom of the bowl to ensure there are no dry bits in the cookie dough.
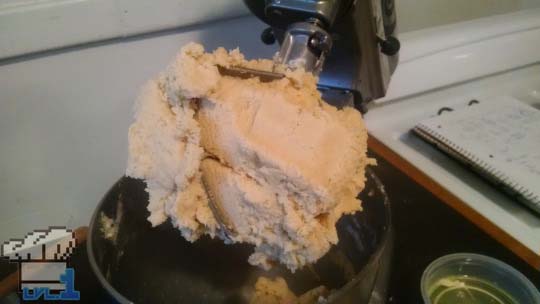
- Once the dough has come together, remove it from the bowl on to a lightly floured surface and divide it into 3 equal portions (about 1 lb each)
- At this point, we will be adding a few ingredients to each dough portion in order to create some variety of flavors and colors for the cookies. The procedure for each addition is simply to add the dough back to the bowl and mix in the new components on medium speed until thoroughly combined (see? Nothing fancy!). If you’re doing all three variations I’d suggest putting them together in this order: square, ring, then heart. This way you won’t need to wash the bowl between types (but do your best to scrape out all the dough before mixing the next type!)
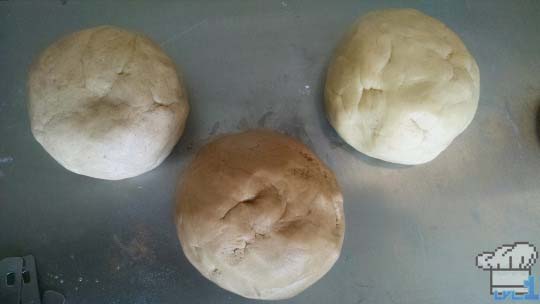
- Wrap each flavor of cookie tightly in plastic wrap and chill in the fridge for at least 1 hour
- To bake the cookies, flour your work surface and roll out the dough of your choice to 3/8th’s to 1/4 inch thick. Use the appropriately shaped cookie cutter (or whatever you can find) dipped in flour to cut a number of shapes out of the dough. Place these shapes on a parchment-lined cookie sheet and place in the refrigerator for about 10 minutes to firm up. Preheat the oven to 350F.
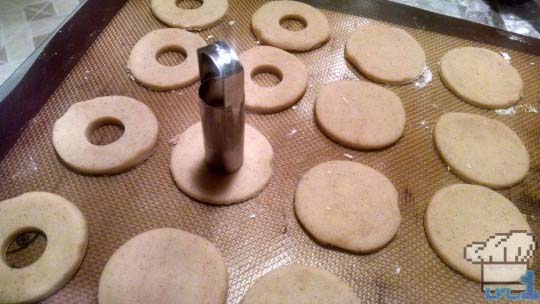
- Bake cookies for 12-14 minutes, giving them one turn during the process. They’ll be done once you can see a slightly brown edge forming on the bottom of the cookies. Remove from the oven to cool and immediately sprinkle the tops with salt (you’d be surprised at how big a difference this makes.)
+ Cookie-Press Cookies +
This is the recipe you will use for the Flower cookies. It will provide a slightly softer dough than the recipe above; this makes it more ideal to be squeezed through the die of a cookie press. If you don’t have a cookie press, feel free to use the sugar cookie base recipe above, and just use a flower shaped cookie cutter to achieve much the same result
ITEMS
| Ingredient | Amount |
|---|---|
| Butter | 6 oz (1 1/2 sticks) |
| Sugar | 1/2 cup |
| Egg Yolk | 1 each |
| Vanilla | 1/2 TBSP |
| AP Flour | 1 3/4 cups + 2 TBSP |
| Salt | 1/2 tsp |
EQUIP
- Electric Mixer
- Plastic Wrap
- Cookie Press (I’ve always called it the cookie gun)
- Cookie Sheets
WALKTHROUGH
The method for this cookie recipe is the same as above. It’s what’s known as the “Creaming Method,” and is used for most cookie recipes, and many cakes. To that end, I’ll be going through the procedure much quicker this time.
- Add the butter and sugar to the bowl of an electric mixer, fitted with the paddle attachment, and cream together until light and fluffy; about 2 minutes. Add the egg yolk and vanilla, then mix to combine. Add the dry ingredients in a few separate additions, and mix until fully incorporated. Wrap the dough tightly with plastic wrap and place in the refrigerator to chill for at least 1 hour.
- Fill the cookie press, fitted with a flower die, with the dough and squeeze them out at least an inch apart on a nonstick cookie sheet (it may take a few tries to find the perfect size; for me it was about one full and one half squeeze).
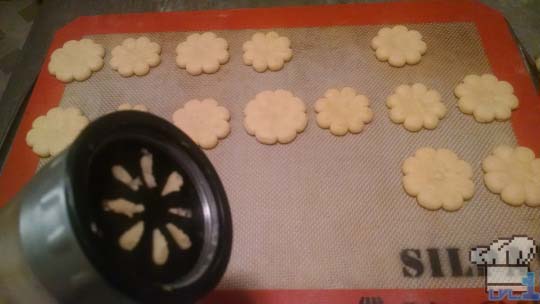
- Fill in the centers with extra cookie dough if necessary. Place back in the fridge for about 10 minutes to firm up and preheat your oven to 350F.
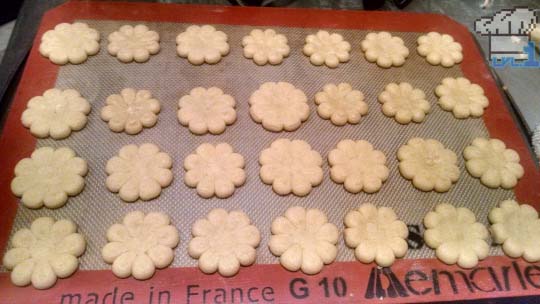
- Bake cookies for 11-13 minutes, giving them one turn during the process. They’ll be done once you can see a slightly brown edge forming on the bottom of the cookies. Remove from the oven to cool and immediately sprinkle the tops with salt (just like in the previous recipe!)
+ Checkerboard Cookies +
I decided to use the recipe over at Itadakimasu Anime for this one. Click here to check out their recipe, and more cool anime food stuff!
ITEMS
| Ingredient | Amount |
|---|---|
| Butter | 8 oz (2 sticks) |
| Sugar | 3/4 cup |
| Confectioner’s Sugar | 1/2 cup |
| Egg Yolks | 2 each |
| Vanilla | 2 tsp |
| AP Flour | 2 cups |
| Salt | 1/2 tsp |
| AP Flour | 2 TBSP (see below) |
| Cocoa Powder | 2 TBSP (see below) |
| Melted Chocolate | 1 oz (see below) |
| Egg | 1 each (for egg wash) |
| Water | 2 TBSP (for egg wash) |
EQUIP
- Electric Mixer
- Plastic Wrap
- Rolling pin
- Pastry Brush
- Sharp Knife
- Parchment Paper
- Cookie Sheet
WALKTHROUGH
- Use the Creaming Method, as described above; and once the dough comes together, take it out of the bowl and split it into two equal pieces.
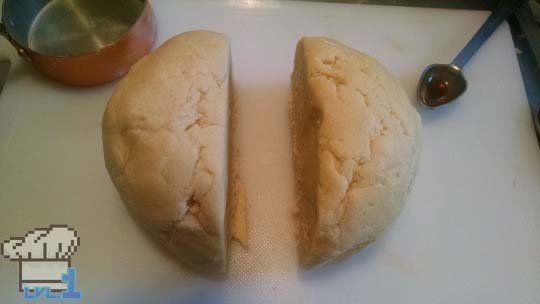
- Replace one of the dough pieces in the mixing bowl and add 2 TBSP AP flour. Mix thoroughly, remove, wrap, and chill.
- Place the second dough piece in the mixing bowl and add 2 TBSP of cocoa powder and 1 oz of melted chocolate. Once again, mix thoroughly remove, wrap, and chill
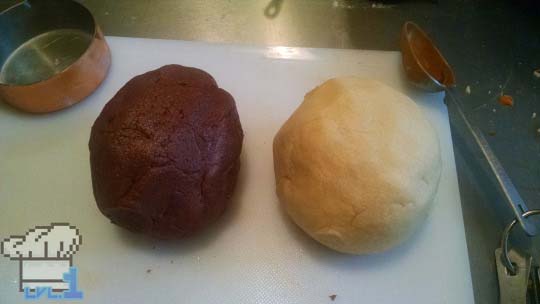
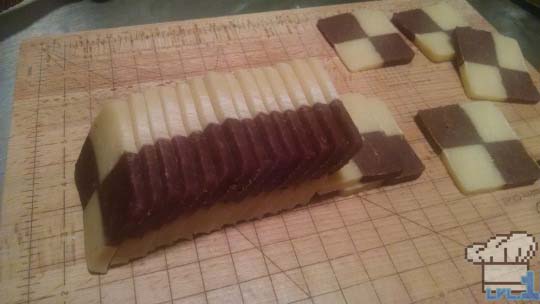
- The pictures will probably be more help than reading this, but I’ll do my best. On a work surface dusted with confectioner’s sugar (also known as 10X), roll each piece of dough into a long rectangle (mine were 1” x 2” x 9 1/2”).
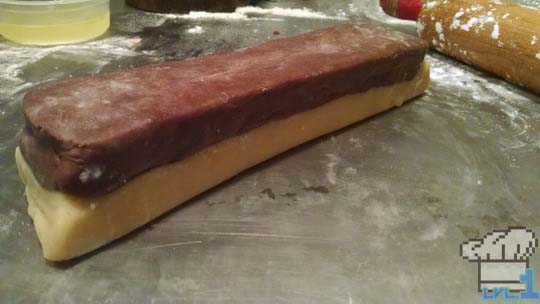
- Make an egg wash with 1 egg and 2 TBSP of water whisked together and use a pastry brush to lightly coat the top of one of your dough pieces. Stack the other piece on top, and gently press them together. Square up the sides by lightly rolling along them with a rolling pin. Once you’ve achieved a good square shape, wrap the dough in plastic wrap and let it chill in the fridge for at least 20 minutes.
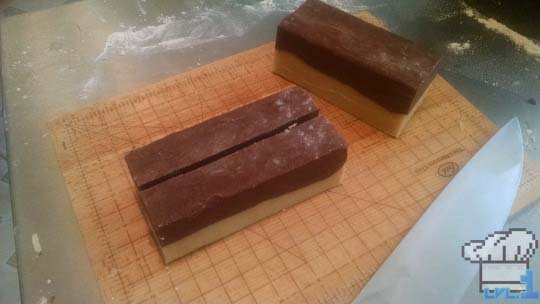
- Draw a sharp knife along the top to bisect the cookie dough length-wise and cut it in half. Flip one of the sides over so that the vanilla and chocolate squares create a checkerboard pattern. Brush the cut sides with a little egg wash and press them together in much the same way as before. Once again, wrap and chill the dough for 20 minutes.
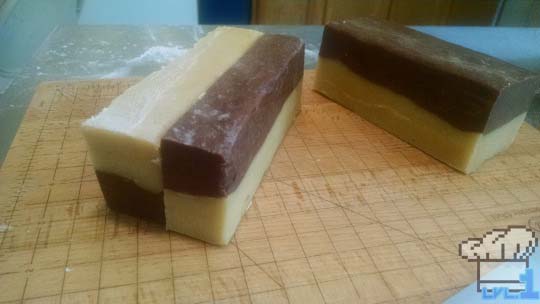
- Now you’re ready to slice! Use a sharp knife and try to go for 3/8ths of an inch to 1/4 inch thick slices. When they’re all cut, place them on parchment lined cookie sheets and give them one final 5 minute chill in the fridge. Meanwhile, preheat the oven to 350F.
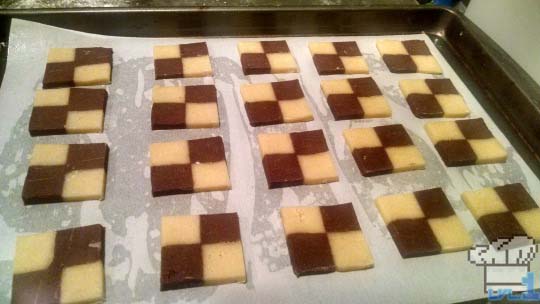
- Bake cookies for 12-14 minutes giving them one turn during the process. They’ll be done once you can see a slightly brown edge forming on the bottom of the cookies. Remove from the oven to cool and immediately sprinkle the tops with salt (again, such a huge difference!).
+ Decorating the Cookies +
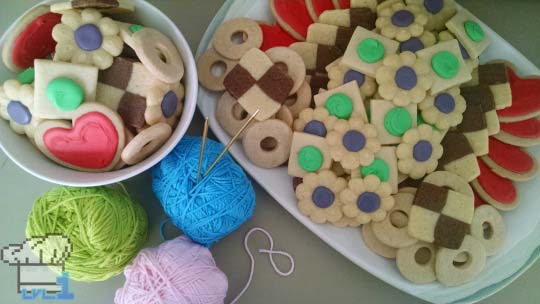
From the picture below, I made my own royal icing and colored it, but using your own icing dyes can get expensive (especially for such vibrant colors!). With that in mind, I’d recommend just getting some colored icing at the grocery store and decorating as you see fit. Sorry to wimp out on you guys, but believe me when I say I’m saving you about 20 minutes of cleanup time, alone, at least! Haha.
Hey! Thanks for reading all the the way to the end! You’re awesome :D! If you haven’t already and are looking for more nerdy food stuff, consider following me on Twitter, Facebook, tumblr and Instagram. I post a lot of work in progress pictures for the blog as well as some stuff from my real job as a pastry chef. If that sounds like something you’d be into, please check out those links above! Anyway, take care everyone and I’ll see you soon with an all new recipe!

