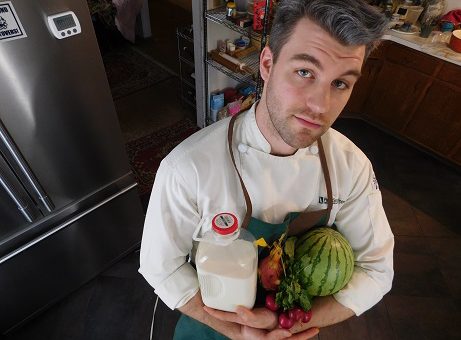
Welcome to #ZeldaMonth 2016! Ever since I did recipes for the soups from Twilight Princess last year, I’ve wanted to tackle another game in the series, but I never thought it’d be Spirit Tracks! Although the game doesn’t have much in the way of unique food items, it DOES include a train made out of giant desserts, so obviously there was no way I could pass that up. Throughout the month of November I’ll be updating with a new train car every week until we finally put it all together on the final day. I’ve been looking forward to sharing this project for a while, so let’s not waste any more time and jump right into our first (or last) segment: the Freight Car Cheesecake! FULL STEAM AHEAD!
Background:
It just so happens that Spirit Tracks was just recently released on the Wii U Virtual Console, but just in case you haven’t gotten a chance to play it, I’ll bring you up to speed. In the game, you use your train as the main means of world travel, much like the King of Red Lions in the Wind Waker. This train is made up of four separate cars including: the engine at the front, a cannon car for taking out bad guys, a passenger car for transporting good guys, and a cargo bed for carrying, well, cargo. What’s really cool is that during your travels you’ll begin collecting crafting materials that are used to customize your train with different style cars. The Sweet Train set that’ll I’ll be covering is one of these styles:
In addition to the in-game models, one can also find concept art of the train(s) in the Hyrule Historia art book. The two versions appear fairly similar (apart the cannon car,) but it’s always nice to have additional reference material!
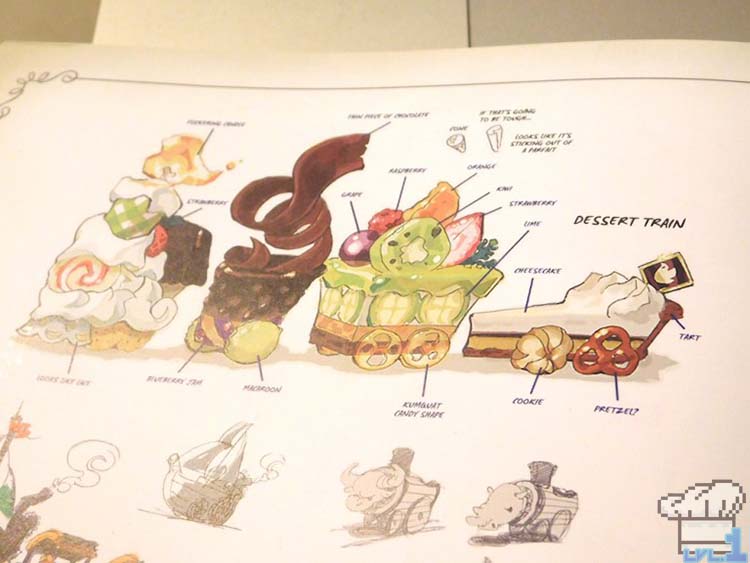
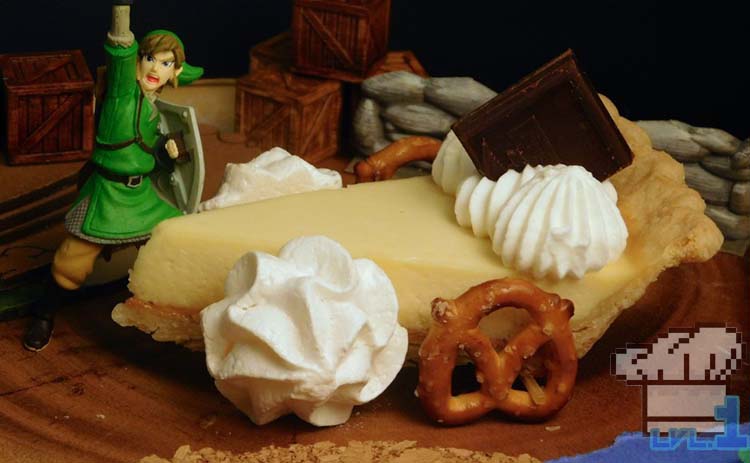
Today we’ll begin with the caboose of the train, in this case the freight car. It appears to be a cheesecake with tart dough crust, pretzel and meringue cookie wheels, whipped cream, and a chocolate square for garnish. Not too bad, especially when you look at some of the crazier train cars that await us later this month haha. Let’s dig in, shall we?
+ Pie Crust +
ITEMS
| Ingredient | Amount |
|---|---|
| AP Flour | 1 cup |
| Sugar | 1 TBSP |
| Salt | 1/2 tsp |
| Butter (cold) | 5 oz |
| AP Flour | 1/3 cup |
| Water | 3 TBSP |
EQUIP
- Food Processor
- Sharp Knife
- Small Bowl
- Rolling Pin
- Parchment Paper
- 9″ Pie Pan
- Pie Weights /Dry Beans
WALKTHROUGH
1. Preheat your oven to 425F
2. Combine the first three ingredients in the bowl of a food processor and pulse a few times quickly to mix. Use a sharp knife to cut the cold butter into small dice and add it to the bowl. Process the butter with the dry goods until the mixture becomes clumpy and begins accumulating along the sides. Making sure the machine is off, pull the mixture away from the sides and add the second amount of flour. Pulse quickly three or four times or until the new flour is incorporated and the butter pieces appear not larger than the size of a pea.
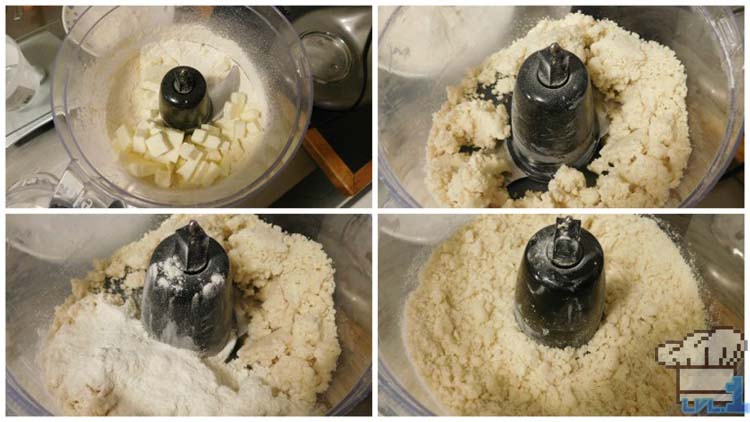
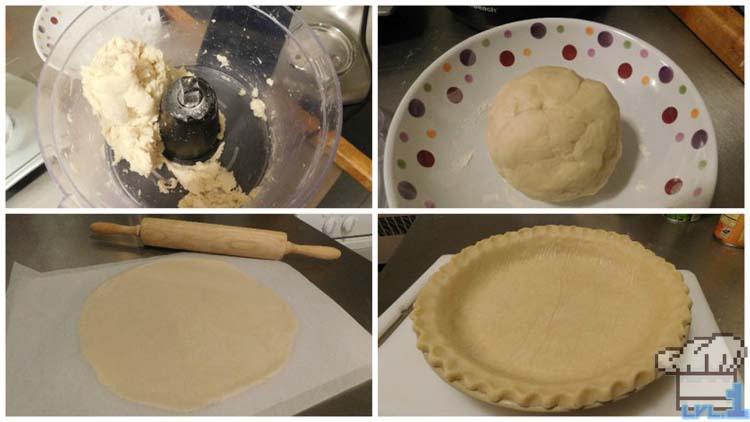
3. Add 6 TBSP of cold water to the dough and process again until it forms a cohesive mass, about 15 seconds. If the dough is too soft at this point you can place it in the refrigerator to firm it up. It should be tacky but not sticking to your fingers. Roll out the dough to be slightly wider than a 9″ pie pan ( I prefer to roll the dough between two pieces of parchment paper so there’s no need to flour the work area.) Place the pie dough on and press it into the pan. Feel free to crimp the edges like I demonstrated in the Butterscotch Cinnamon Pie recipe or just leave it flat. Do make sure that you trim off any excess that may be hanging over the edge however.
Finally, take a fork and poke a few holes in the bottom of the pie shell (docking) and cover with parchment an pie weights (I just use some dried beans.) This will help the dough keep its shape while baking and prevent it from puffing up.
4. Bake the pie shell for 15 – 20 minutes or until the edges begin to brown slightly. Remove the pie weights about half way through (be careful, they’re pretty warm!) in order for the bottom of the dough to crisp up as well. Remove from the oven and set aside to cool.
+ Cheesecake Filling +
ITEMS
| Ingredient | Amount | |
|---|---|---|
| Cream Cheese (soft) | 14 oz | 395 g |
| Sour Cream | 2/3 cup | 170 g |
| Eggs | 2 | |
| Sugar | 1/2 cup | 100 g |
| Vanilla | 1 tsp | 5 g |
| Salt | to taste | |
| Dulce de Leche | optional | |
EQUIP
- Food Processor
- Rubber Spatula
WALKTHROUGH
1. Preheat the oven to 350F
2. This might just be the easiest cheesecake recipe you’ve ever made! Simply place all the ingredients except the sugar in the bowl of a food processor. While mixing slowly add the sugar a little bit at a time. Once you’ve added about half the sugar, stop the machine and use a rubber spatula to scrape along the inside of the bowl to make sure there aren’t any stubborn pieces of unmixed cream cheese clinging to it. Resume mixing and add the remaining sugar. The cheesecake batter will look incredibly loose, but don’t worry! it’s supposed to be almost fluid at this stage.
3. In order to get the brown stripe across the bottom of the pie like its in-game model. I spread some dulce de leche across the crust before pouring the cheesecake batter on top. This can be bought in the store or simply made by baking a can of sweetened condensed milk for a few hours. If you can’t find any that’s ok too, the cheesecake will taste delicious either way!
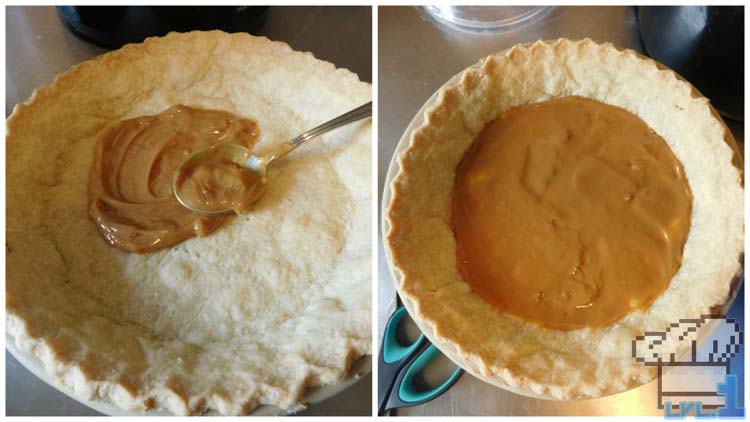
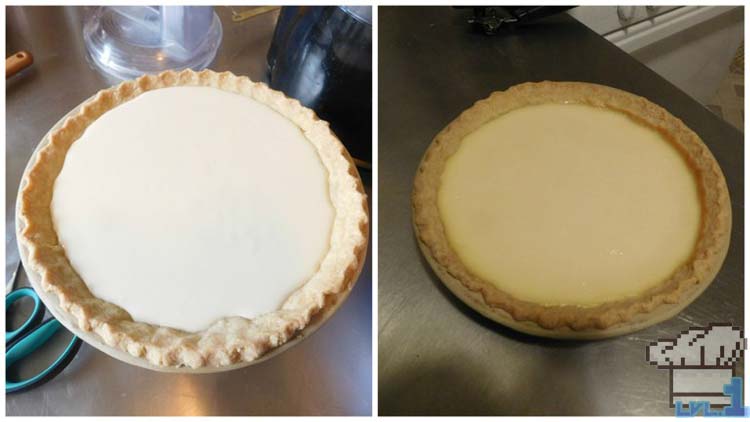
4. Take out your pre-baked pie shell and pour in the cheesecake filling just about all the way to the top of the crust. Bake in the oven for 1 hour and 20 minutes then turn the oven off and leave the door closed for another hour before removing the pie. This ensures a good even cooling of the cheesecake and should help to prevent cracking.
+ Assembly +
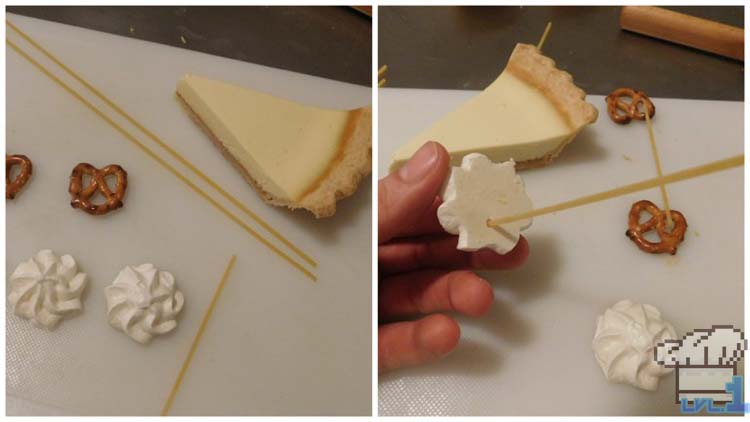
To garnish the cheesecake freight car I purchased some small twist pretzels and square chocolates. Because it has wheels and I wanted it to be technically completely edible, I also bought some thick spaghetti to act as axels that the cheesecake could rest on top of. I followed a recipe for Meringue Cookies I found online that worked very well for the front wheels. And the whipped cream is just your basic heavy cream + powdered sugar + salt affair. So let’s go ahead and assemble this thing!
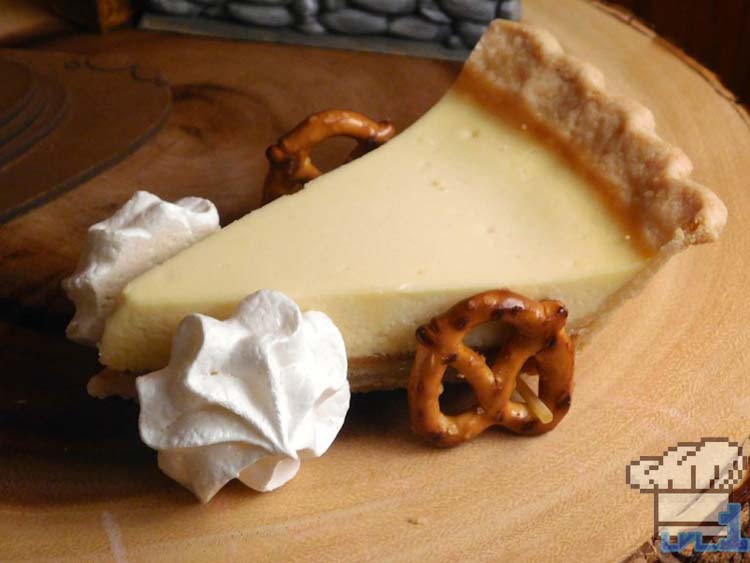
After propping up the cheesecake, we can move on to the final decoration of whipped cream and chocolate and you’re done!
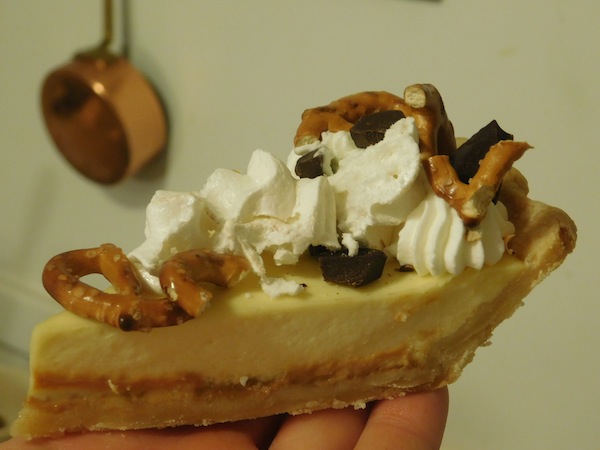
Oh, and just in case you were wondering, it eats pretty nicely as well :9.
Hey! Thanks for reading all the the way to the end! You’re awesome :D! If you haven’t already and are looking for more nerdy food stuff, consider following me on Twitter, Facebook, tumblr and Instagram. I post a lot of work in progress pictures for the blog as well as some stuff from my real job as a pastry chef. If that sounds like something you’d be into, please check out those links above! Anyway, take care everyone and I’ll see you soon with an all new recipe!